Home › Forums › Streetfighters › Stealth Monster (or KawaZuki)
- This topic has 26 replies, 7 voices, and was last updated 15 years, 9 months ago by
 hammy.
- AuthorPosts
- August 9, 2008 at 2:38 pm #13355
 N1teMareParticipant
take ya pick …
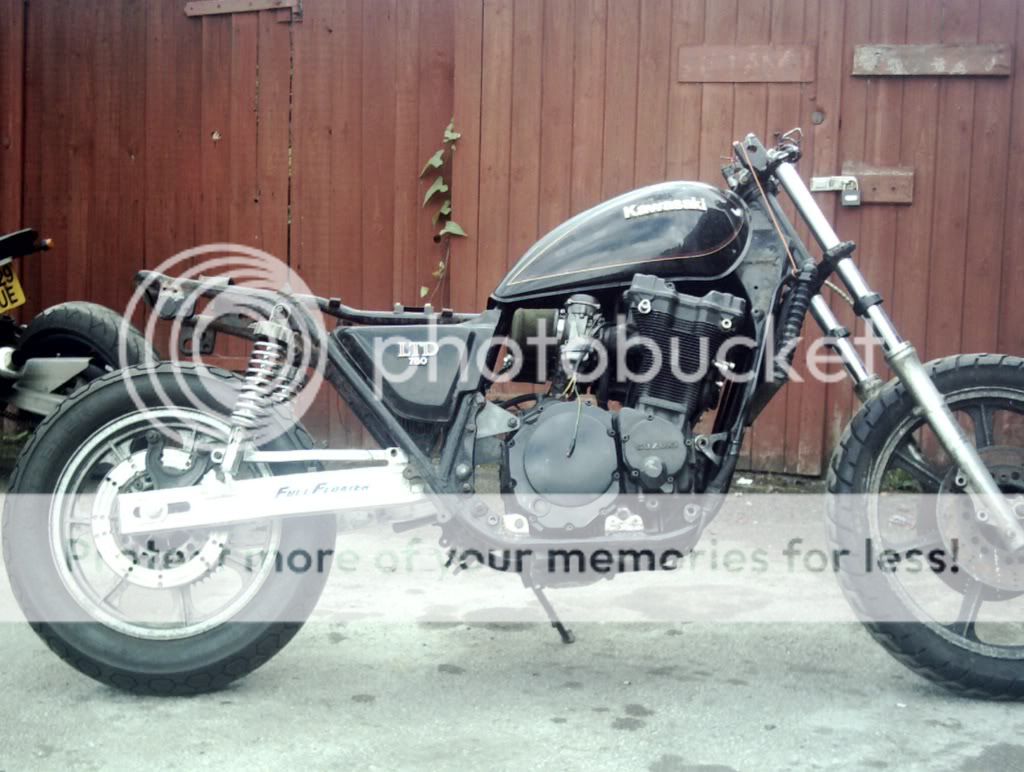
ok we’ll start at the beginning, a few weeks ago i picked up this in a swap …1052cc

then a week or so later i was given the remains of one of these …
a million bits in boxes

then started the working out where stuff gotta go…
600 engine in there temporarily

i then decided to mount the engine off the original front frame mounts to allow the downpipes to reach and allow me to work out the size/shape of the rest of the plates/spacers (9mm thick spacer on the left front engine mount to centralise the engine)…
getting started

frame mounts and spacers…
welded in

spacers and plates

i decided that being as the Z750 swingarm was rotten across the web and i had ab old slabby 750 arm laying about i’d fit that, so out cam the angle grinder and i shaved a total of 6mm (or near as dammit) out of the frame pivot points (3mm each side) slowly and carefully…
it fits

i then decided to keep it twin shock so out came the angle grinder again, then onto a milling machine that i have access to and this was the result …
bits to be welded

i had to make my own gearchange linkage up out of bits…
gear pattern reversed [:0]

pulled 600 engine out and replaced it with the 1100, the tank now sits a little too tightly so the angle grinder will be taken to that to wrap it round the cam cover…
no space

exhaust purchased and loosely fitted/wedged in place…
shiney bit

there’s other bits i’ve done and had to redo but i think that’s enough info for now …
p.s.
swingarm is all welded up and almost ready to go in, pictures to follow later when ready [ ]August 9, 2008 at 3:43 pm #56275
 imperialdataKeymaster
Very nice to see it all going together. For a lot of people (myself included) the build is almost as exciting as the ride. Look forward to seeing the end result, what are you gonna call it?
August 9, 2008 at 7:31 pm #56276 N1teMareParticipant
what am i gonna call it ? …
probably have KawaZuki hidden under the paint (if i can get it correct), but it’ll still be my Stealth Monster [
 ]
]anyway here’s another little update
my neighbouring workshop has kindly donated me the use of his milling machine and lathe a couple of weeks ago so this is the latest item i’ve made …
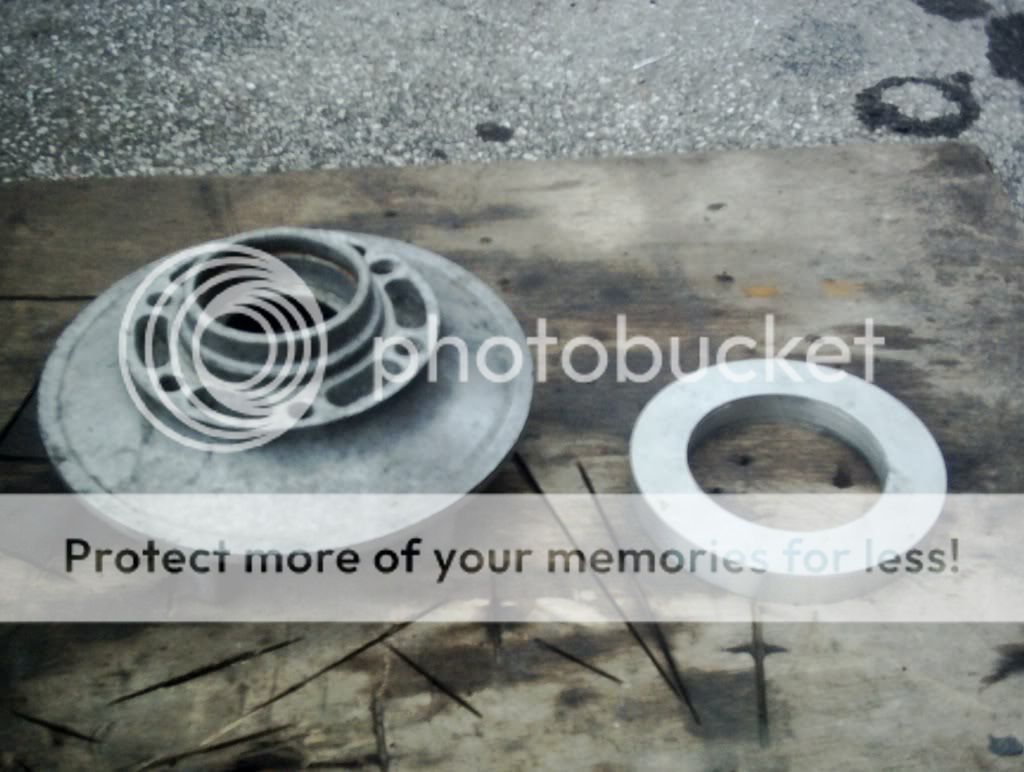
one offset spacer for the rear sprocket out of 16mm plate ally (since been drilled)

swingarm lugs all welded on by my tame tig welder (you need his number/location just pm me)and drag slots created with a jigsaw and file (will post a picture of it in the frame tomorrow)…
ain’t this looking good [
 ]
] August 10, 2008 at 8:01 pm #56277
 N1teMareParticipant
latest picture …
swingarm in loosely (gotta make some long adjuster bolts) and have been working out the mounts for the cooler, kawasaki hid two bolt holes in just the right place to hang a bracket from for the top mounts just gotta get some 3mm plate and one bottom rubber, then a little drilling, welding and cutting and that’ll be sorted (not necessarily in that order)
 August 11, 2008 at 5:27 pm #56278
 imperialdataKeymaster
Nice. Are you going to raise the tank or modify it?
August 11, 2008 at 8:49 pm #56279 N1teMareParticipant
quote:
Originally posted by imperialdataNice. Are you going to raise the tank or modify it?
well it was suggested by a couple of other lads that i modify it to wrap around the back of the cam cover and i succumbed to the idea, so yesterday i got my angle grinder out and carefully started carving …
believe it or not all i’ve had to do is grind the lip back carefully and it now gives me roughly 4mm of clearance and sits nicely on the mounts [
 ] ok it leaks now, but all i gotta do is take it to my tig welder and get him to seal it back up [
 ]
]todays effort (no pics) …
done next to fook all today, just scrounged a piece of 3mm steel and carved the top bracket for the oil cooler, gotta get a couple of M8 countersunk bolts to weld in it and that’ll be the top sorted, still gotta carve the bottom mounts (anyone got one of the bottom rubber mounts laying about, i think all oil burners use them including teapots, dig it out for me and give a shout please)…
had another look at the exhaust downpipes to see how they’ll hang (bolted this time) looks like i’ll have to make my own spacers/seals, 10mm thick at least to give me a tiny bit of clearance on the frame down tubes, might have to make extensions that go in the exhaust ports tho so that the exhaust comes out even further, we’ll see as soon as i find the ally tube for dicking about with (yes, i have an ancient lathe that i can make spacers on in my own time )
August 11, 2008 at 10:12 pm #56280 conParticipant
lookin good mate
August 12, 2008 at 10:03 pm #56281 RadarModerator
Interesting stuff, keep us posted!
I have added it to the reccommended posts too
https://bikemeet.net/forums/topic/great-posts-pics-across-the-site-part-2/
August 12, 2008 at 11:50 pm #56282 N1teMareParticipant
quote:
Originally posted by RadarI have added it to the reccommended posts too
aargh you really shouldn’t recommend anything i do, if only for the sake of your sanity [
 ]August 13, 2008 at 10:01 pm #56283
 katanaParticipant
Welcome M8 – Great project
August 14, 2008 at 10:08 pm #56284 N1teMareParticipant
a little update …
a picture of my fuel line adaptor to feed the remote tap (needs brazing now)

and a picture of my cooler top mount (carved with angle grinder)

i’m now working on the template for my coils mounts (should be carved in a couple of days)…
crappy problem appeared today to slow things down, i’ve popped something in my lower back whilst lifting a 5 gallon drum so i’m back to seizing up if i don’t move regularly
 August 14, 2008 at 10:36 pm #56285
 RadarModerator
Good to see progress continuing. Hope you can get through the pain barrier. Looking forward to following the rest of the build
August 17, 2008 at 11:43 pm #56286 N1teMareParticipant
ok finally managed to do a little more …
so out with the trusty weetabix packet

use that template twice and i now have my coils mounted tidily

apart from making 4 more spacers that’s all i’ve done this week, really slow going due to my back playing up and me having to be really careful
oh well progress is progress
 August 17, 2008 at 11:52 pm #56287
 RadarModerator
Clever use of the cardboard to make templates, a trick I have used at work over the years.
August 23, 2008 at 11:36 pm #56288 N1teMareParticipant
ok a little update (no pictures yet)
due to one thing and another along with my back problem there’s been very little progress this week, apart from me mostly looking and thinking about how to get round problems…
figured out where to mount the fuse panel, cdi and starter solenoid tidily and out of the way, all nicely mounted onto the battery box and only one bracket needed to be made by me, no welding required

made a start on the front seat base, 1mm sheet steel roughed out to shape then folded over the edge of my workbench with the aid of a couple of clamps, a 3×2 timber and a couple of hammers (several different folds to get the basic shape) then work out how to fold the sides down …
a little more bashing and trimming required but it’s getting close..
photo’s and further bashing will resume monday

- AuthorPosts
- You must be logged in to reply to this topic.


